Showing posts with label growing foods. Show all posts

October 31, 2015

Kitchen Gardening for starters


A kitchen garden doesn’t means you have to garden inside your kitchen, rather it refers to a garden where you can get fresh healthy vegetables to cook In your kitchen. Though the closer the garden to the kitchen better it is for you to collect the vegetables in fresh condition.

For the starters it is recommended to start small and plant what you want to eat, you can always do the add on later. It will not only maximize your pleasure and health it will add energy to continue the activities of Gardening for the longer period.  Choosing a site is very important for the success of Gardening. Given a choice between a sunny spot and a shaded one I would recommend to choose the place with the presence of sunlight. For details on the effect of  sunlight on the growth of plants check out my earlier blog Sun or No-sun.

Next step is to prepare the media for growth. It can be soil or Soil-less. You can directly put the seeds or the seedling into the soil. In case the soil is not of good quality or lack proper drainage, you can always go soil-less. There are different types of soil-less media available. I have discussed some of them here. Whatever the option you take make sure there are no weeds present in the media.
Next is to add compost to the media. It controls weeds adds organic matter to the media and also retains water. More on this here.

The next choice you have to make is whether to start with seeds or with transplants. It is always better to start with transplants as there are fewer chances of mortality and more the chances of success specially for plants like tomato or brinjal. Though many gardeners starts with seeds due to lower cost, more variety and more satisfaction to see a plant go from seed to fully grown.
Make sure your plants don’t die of thirst. Fruits and vegetables require lots of water. Specially in case of transplants, you need to provide enough amount of water initially as the plants yet to grow deep root structure.

Lastly one single tip. It is important to plant some of the flower plants along with the vegetables plants to your Kitchen Garden. Flowers add colours to the garden as well as attract beneficial insects which promote pollination. In some cases it also repels some of the undesirable and harmful insects.

I hope you got what you are looking for. Help others by sharing the content. By the mean time you can check out this Cool looking 4-Tray Kitchen Seed Sprouter

October 30, 2015

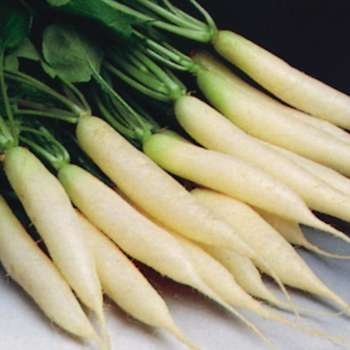
Growing Radish: Some basic Facts


Radish is one of the easiest crops to grow. This is ideal for the beginners who are trying their hands on gardening.


A pH of 6 to 6.8 is ideal for growing radish. You can add other growing media with the soil to make it appropriate if the soil nearby is not up to that pH range. A list of the growth media can be found here. In normal cases fertilizers are not that necessary if you have put compost in the soil before planting the seeds. Avoid fresh manure or material which are rich in nitrogen.

Radish plant required direct sunlight at least 6 hours a day. Plant your plant accordingly. Put the seed in the soil at ½ inch depth and cover it with soil. The spacing between the plant should not less than 2 inch. Once the seedlings have grown about 2 inches in height thin them up to 3 inches apart. Lack of thinning can lead to inedible and shriveled roots.

Keep the soil moist by watering regularly. If s the soil is very dry it can result in radishes with very pungent flavor, whereas too much water can make the roots rot. If want to know more about watering check out my earlier blog.

Radish plants are not very much prone to diseases, on the contrary it is much more beneficial to other crops if you are thinking about companion planting. Planting radish along with cucumber or squash can reduce the beetle which affects cucumber or squash. It also attracts leaf bugs away from spinach. Sometimes there are some larva which attacks the radish roots. Crop rotation can resolve this problem. You can also add a good amount of wood ash to prevent these problems.

The best part of a radish as far as the beginners are concerned is that it matures very quickly. You can harvest your radishes with 3 to 4 weeks depending on the species. In case you are not sure of its size pull it out from the soil in case you find the radish is still immature, you can always replant it. It is always better to pull out a little immature radish than to take out over-matured. Oversize radishes can taste woody and unpleasant to the tongue.

The storage of this is similar to that of carrots. You need to cut off the leaves to eliminate any chance of further growth. Store them in refrigerator. You can use them for one or two weeks.

Radish are not very much known more their nutritional value, rather they are famous for their tasty addition to salads.


What do you think about this article. Share your thoughts.

October 29, 2015

Growing Spinach of Your Own: A Basic Idea


Spinach is one of the vegetable from our list of easiest to grow vegetables. It is very easy to grow and maintain.

Though spinach is famous for iron, there are several other elements which are far more in spinach than the iron. Vitamin A and K are more abundant in spinach. If you want to take the best of iron from spinach add some slices of oranges to increase the absorption. 

Spinach is a winter crop. Some variety can even survive frosts also. It can mature within a month or so. Though it requires full sun but much heat can result in early bolting of the spinach.

The ideal pH for spinach is 6.5 to 7. Add lime to reduce the acidic nature of the soil in case pH is less than this level. Mix compost along with water prior to planting the seeds. Put the seeds ½ inch deep and at 2 inches space. It is wise to plant spinach with a little space in between. This can prevent many problems due to moisture in the air. If you are using container planting you can put 3 seeds per pot with a minimum gap of 1 inch.

DO NOT grow spinach in the same soil where beets or chard has grown earlier. These have similar requirements from the soil and also they are nest to the same kind of parasites as of spinach.
When the plant reach a size 1/3 of its full height,You can add nitrogen-rich fertilizers to the soil. You can also avoid fertilizers if you had added enough compost at the start.
Water the plant regularly. Mulching is a good idea to restore soil moisture. When seedlings sprout to about two inches, thin them to 3-4 inches apart.

After about six weeks of planting pinch off leaves for your kitchen purpose but keep the central structure intact. These will produce seeds in the later stages. In case you do not require seeds you can pull out the whole plant.

Cliff off any leaf which turned yellow. This will increase the flow of sap to the main plant and the other healthy leaves.

Don’t wait too long for harvesting. After maturity the leaves will turn bitter. You can either take out the leaves from the plant or you can cut the whole plant near the roots and enjoy your spinach with your family.

By growing spinach in your own house you can be rest assure about the quality of the fertilizers. To get greater yield chemical fertilizers and pesticides are applied continuously these days. It is always better to avoid those spinach.

The famous cartoon character Popeye have made spinach very popular among the children. Though you will not get the instant gratification of building up large muscles, its benefits are definitely worth mentioning. There are so many benefits of eating spinach. You can eat them both cooked or raw. It helps preventing osteoporosis, fighting against cancer and heart diseases. And last but not least it will definitely add flavor to the taste buds.


Share your views.

Grow Cabbage In Your Home: Some Basic Tips

Cabbage is generally a cool weather crop. There are quite a few varieties available in the market viz Green Cabbage, Red Cabbage, Savoy Cabbage, Pointed cabbage, etc.,


Cabbage can be grown from the seeds easily. Sow seeds one inch deep into the soil. Spacing is very important in growing cabbage two seedling should not be very close to each other.

Generally it is advised to keep the spacing 6-12 inches apart. Another trick in the book is to harvest alternatively to give each plant enough space to grow.

Check your soil pH before planting the seeds. An ideal pH range is 6.5 to 6.8. Lower pH can be prone to club root diseases. To increase the pH of the soil try adding lime along with the soil.

It is important to choose the variety of cabbage wisely and as per your local environment. For example, if you are in cooler climate you can choose slower maturity variety and can grow huge heads, but in case you are in warmer climate it is best to go for fast-maturing variety and grow in the springtime.

As you may have already experienced, cabbage requires regular feeding and a good amount of sunlight. In hot summers provide temporary shade to the plants.

For a good cabbage head you need to maintain a constant level of moisture. Water regularly. Uneven watering can make the cabbage head crack. Check out this watering guide before start giving water to the plant.

Applying mulch and mixing compost with soil can provide the solution. Once the new leaves began to emerge apply fertilizers such as fish emulsion, blood meal, etc., A compost made of tea can be very helpful to the plant. It provides the much needed nitrogen to the plant in case the leaves are turning yellow.

Cabbage is one of the vegetables that is very much prone to pests and diseases. One of prominent sign is holes in the cabbage leaves. There are so many insects such as cabbage loopers, slugs, aphids, root maggots, etc., some most frequent diseases include club roots, yellow leaves, black rots, etc., though the variety of problem differs very much and their particular solutions can vary, one of the general solution is to go for companion planting. In case the plants are already attacked by some molds or fungal diseases, it is wiser to remove the plant. Also, crop rotation prevents many of the pests.

You can be sure that the cabbage is ready for harvesting once you can feel their head become firm. Cut the head with a sharp knife from the stem. You can refrigerate the heads for two weeks.

Raw and chopped cabbages can provide a great compliment with barbecue and seafood. There are so many good recipes involving cabbage is present in many cultures. Cabbage is good source for vitamin A, C and Iron.


What is your experience regarding growing Cabbage? Do you have any trick to share? Any advice will be welcomed.

October 28, 2015

Grow Garlic: A useful plant In Companion Planting


A nickel will get you on the subway, but garlic will get you a seat.

Once we discuss growing ginger, garlic is not very far behind. Today we will discuss about Garlic.

Botanical name: Allium sativum

There are basically 2 varieties of Garlic are available.

Soft-neck variety: in this type of garlic the neck of the garlic stay soft after harvest. This variety is the easiest to grow. This variety is also recommended particularly for the warmer climatic areas.

Hard-neck variety:here garlic has a stiff stem that dries to a rigid stick. And it makes braiding almost impossible.

Garlic is grown from the cloves. For growing, you need to plant the cloves into the ground with root end down and pointed end up. Break the cloves from the bulb but do not remove the papery husk which surrounds individual clove. Put the cloves two inch inside the soil with 6 to 8 inches apart. Each clove will produce a single bulb and the largest clove generally produces the largest bulb. If you planting the clove into normal soil and not in any soil-less media, it is better to soak the cloves in water containing baking powder and liquid seaweed to prevent fungal diseases.

Planting cloves from the grocery store can be a bad idea. They are generally treated with various chemicals to make their self life longer. Instead try your local nurseries or seed selling companies for the cloves.

Make sure your soil has plenty of organic matter. To increase the fertility you can always add compost to the soil. Select a place where the sun exposure is good. Garlic requires plenty of nitrogen so choose your compost ingredients accordingly.

Once you planted the cloves cover it with mulch. If you are new to mulching, and want to know more about it, check out this article. After 6 to 8 weeks, depending on the variety and the weather, you will find the shoots coming up through the mulch.  Water requirement of garlic is normally not huge. Inch deep water in every week is more than enough. Stop water once the leaves begin to yellow. This will help to make the bulbs firm.

Garlic has very few pest problems. Rather it is a pest repellant. That is why in organic pest controlling methods, using garlic is a common phenomenon.

You can harvest the garlic once three-quarter of the leaves become yellow. Dig up all the bulbs and get them out of the sun immediately. Keep them in dry and shaded place for six weeks. Once they become thoroughly dry trim the roots. Cut off the stalk 1 inch above the bulb. Now you can use your garlic.


Apart from its intense flavor and culinary uses it is very good insect repellant and thus used widely in companion planting. More about companion planting and its benefits check out this article.

Do you have Suggestions. Feel free to post it.

Peas: A growing guide


Peas are cool climate plant. It prefers sandy loam soil with a great drainage facility. With a pH level of 6.5 to 7.5 is generally idea for peas. In case your soil is much more acidic than this add dolomite or lime with the soil to bring it to this optimum level.


Plant different varieties all at once and don’t make an attempt to plant them with some time gap. They will mature in different times and give you a longer time to harvest and enjoy the peas. Check your local garden shop for different varieties of seed available in your locality.

Peas are one of such a plant that requires very less fertilization. With the help of the nitrogen fixing bacteria in their roots they can manage their share of nitrogen. Though you have to add other nutrients from time to time you rarely need to add nitrogen. Excess amount of nitrogen can result in lush foliage and reduction in pods. Please keep this in mind in case you prepare your own compost, and add lesser amount of nitrogen rich materials.

For a good pea production you need to take care of the watering needs of the plant. Generally deep watering once or twice in a week will be sufficient. In the time of blossoming you need to provide extra water. A dry soil can drastically reduce a chance for a good pea production. A good sunlight is required for the fruit production so don’t ignore that.

Provide support as per the variety of the plant. For taller varieties you need to provide trellis, bamboo canes or netting. For dwarf varieties netting will be sufficient.

Please make sure not to plant peas or any legume plant in the same soil more than once in a three years.
Being a legume plant pea is very good in companion planting. It works well with most of the plants. Radish, spinach, lettuce all leafy vegetable all do well with peas. Cucumber and potatoes show special affinity towards peas. Just avoid garlic and onions for better pea production.

One important tip for harvesting. Don’t pull out the roots while harvesting rather cut off the stem above the ground level. The roots contain nitrogen fixing bacteria. Allow these root to rot down in the soil to increase the nitrogen content of the soil which will be beneficial for the next plant in that soil.

The root system of a pea plant is not very deep. So while picking the pods use both of your hands, one to hold the vines and pick the pods with the other one. To increase the pod yields you need to pick them regularly. The yield will be reduced in case the overly matured pods are left in the vines.

The best way to enjoy peas is fresh and direct from the plants. But in case your production is much more than daily consumption, you can definitely store in refrigerator or you can even dry them in sunlight and then also store them in containers.

Hope you have enjoyed the article. Like to know your feedback on this.
Related Posts Plugin for WordPress, Blogger...